Device Packet Output
Device Packet Output sends selected telemetry fields to external hardware.
Use it for:
- Arduino dashboards
- ESP32 receivers
- shift lights
- gear displays
- serial tools
- custom UDP devices
DashForge also has dedicated modules for hardware that needs a higher-level signal instead of arbitrary field packets:
- Bass Shakers: generate low-frequency audio from telemetry.
- Wind Simulator: generate fan levels and PWM values from speed, throttle, brake, and steering.
Setup
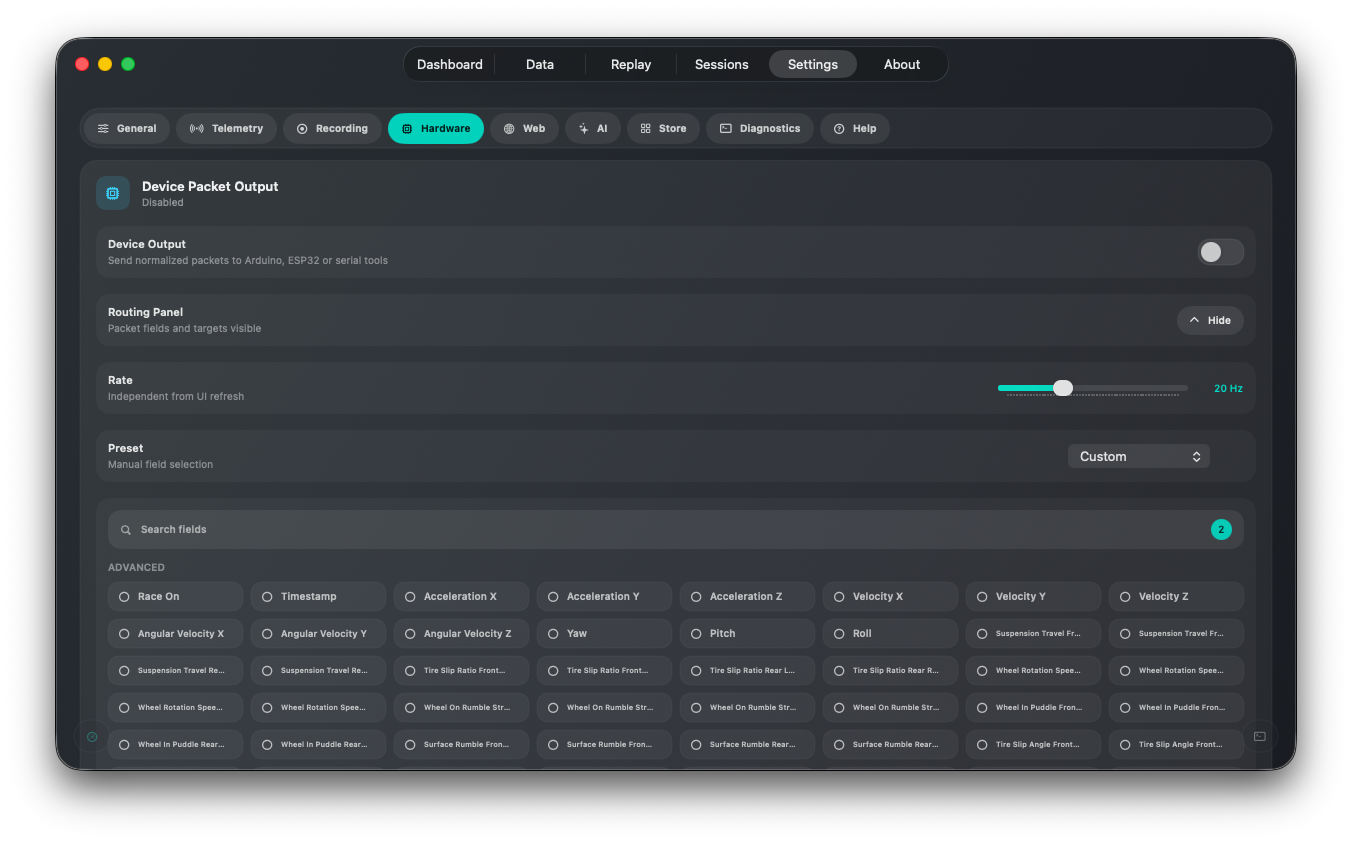
- Open
Settings > Hardware. - Enable Device Packet Output.
- Choose an output rate.
- Select the telemetry fields to include.
- Add a UDP or serial target.
- Test with a small field set first.
Start at 20 Hz. Displays, shift lights, and gear indicators rarely need the
same rate as the dashboard UI.
Field Selection
Keep packets small. Hardware usually does not need the full telemetry model.
Good starter fields:
- speed
- RPM
- gear
- throttle
- brake
- fuel or battery
- flags or race state
Use presets when possible, then switch to manual selection for custom rigs.
UDP Output
UDP is best for ESP32 or network receivers.
Recommended first test:
127.0.0.1:4210
Use a real device IP once the packet format is confirmed.
Use UDP when:
- the hardware is on Wi-Fi or Ethernet
- several devices need the same packet
- you are testing with DashForge Lab or a local script
Serial Output
Serial is best for USB Arduino-style boards.
DashForge auto-detects serial outputs from /dev/cu.* and shows them as a
drop-down list when you add or edit a Serial target. Use the refresh button if a
board was plugged in after opening Settings. If no serial device is detected,
DashForge keeps a manual path field for advanced setups.
On macOS, prefer real board paths such as:
/dev/cu.usbmodemXXXX
/dev/cu.usbserialXXXX
Pseudo-terminals like /dev/ttys002 can be blocked by macOS permissions depending
on how they were created.
When app logging is set to Debug, DashForge also reads incoming serial lines
from the board and writes them to the log under HardwareOutput.Serial. Use
Serial.println("OK") or Serial.println("ERR ...") in Arduino firmware to
debug packets without opening a second serial monitor.
Packet Format
DashForge sends one JSON line per target update. The selected fields are placed
inside values.
Example:
{
  "v": 1,
  "type": "telemetry",
  "seq": 42,
  "sentAtMs": 1793450000000,
  "values": {
    "speedKmh": 124.3,
    "currentEngineRpm": 6870,
    "gear": 4,
    "accel": 100,
    "brake": 0
  }
}
ArduinoJson-style pseudo code:
StaticJsonDocument<512> doc;
DeserializationError error = deserializeJson(doc, Serial);
if (error) return;

float speed = doc["values"]["speedKmh"] | 0.0;
int rpm = doc["values"]["currentEngineRpm"] | 0;
int gear = doc["values"]["gear"] | 0;
Keep the JSON document size aligned with the fields you enabled. A shift light needs a much smaller document than a multi-line dashboard.
Performance
- Keep output rate independent from UI refresh.
- Start at 20 Hz for simple devices.
- Avoid sending unused fields.
- Disable debug logging during long hardware tests.
For hardware input control, see Game Control and Hardware Overview.