Getting Started
DashForge is a telemetry dashboard builder for racing games and sim racing setups.
This page gets you from a fresh install to a working live dashboard.
For a full walkthrough, follow the Complete User Tutorial.
Requirements
- macOS or iOS
- A supported racing game
- UDP telemetry enabled in-game
- Optional: DashForge Bridge for Windows games and game control
- Optional: DashForge Lab for local simulation and testing
Choose Your Setup
| Situation | Start with |
|---|---|
| You want to know whether your game is supported | Supported Games |
| The game can send UDP telemetry directly | UDP Setup |
| The game is Assetto Corsa or ACC on Windows | DashForge Bridge |
| The game is Euro Truck Simulator 2 or ATS | SCS plugin setup |
| You only want to test DashForge | DashForge Lab |
| You want hardware output | Finish telemetry first, then open Device Packet Output |
Launching DashForge
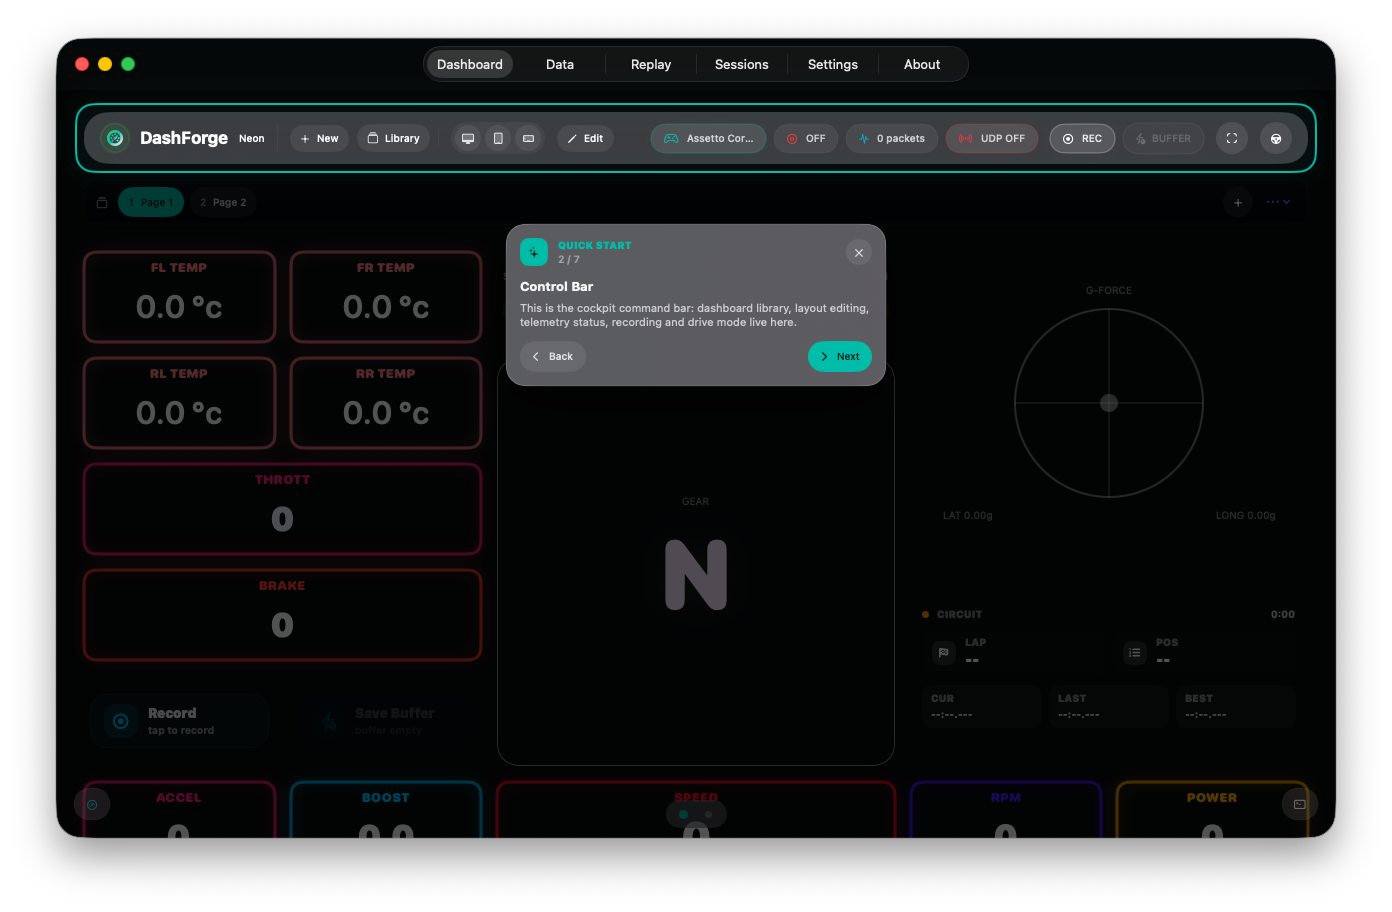
Open the app and go to Dashboard. The top bar shows:
- selected game profile
- live/replay/off state
- packet count
- UDP listener state
- recording and buffer controls
First Five Minutes
- Open
Settings > Telemetry. - Select your game profile.
- Enable the UDP listener.
- Start the game telemetry output.
- Return to
Dashboardand confirm the packet counter increases. - Open
Edit. - Add
Race Control,Circuit Info, andInputs. - Save the dashboard.
If the counter does not increase, fix telemetry before tuning widgets. Dashboards are much easier to debug once live packets are confirmed.
Enabling UDP Telemetry
UDP telemetry must be enabled inside your racing game settings.
Typical configuration:
| Setting | Value |
|---|---|
| Telemetry | ON |
| UDP Output | ON |
| IP Address | Your device IP |
| Port | DashForge listening port |
If the game runs on another computer, use the DashForge device IP address. If the
game and DashForge run on the same Mac, use 127.0.0.1 when the game supports it.
Building Your Dashboard
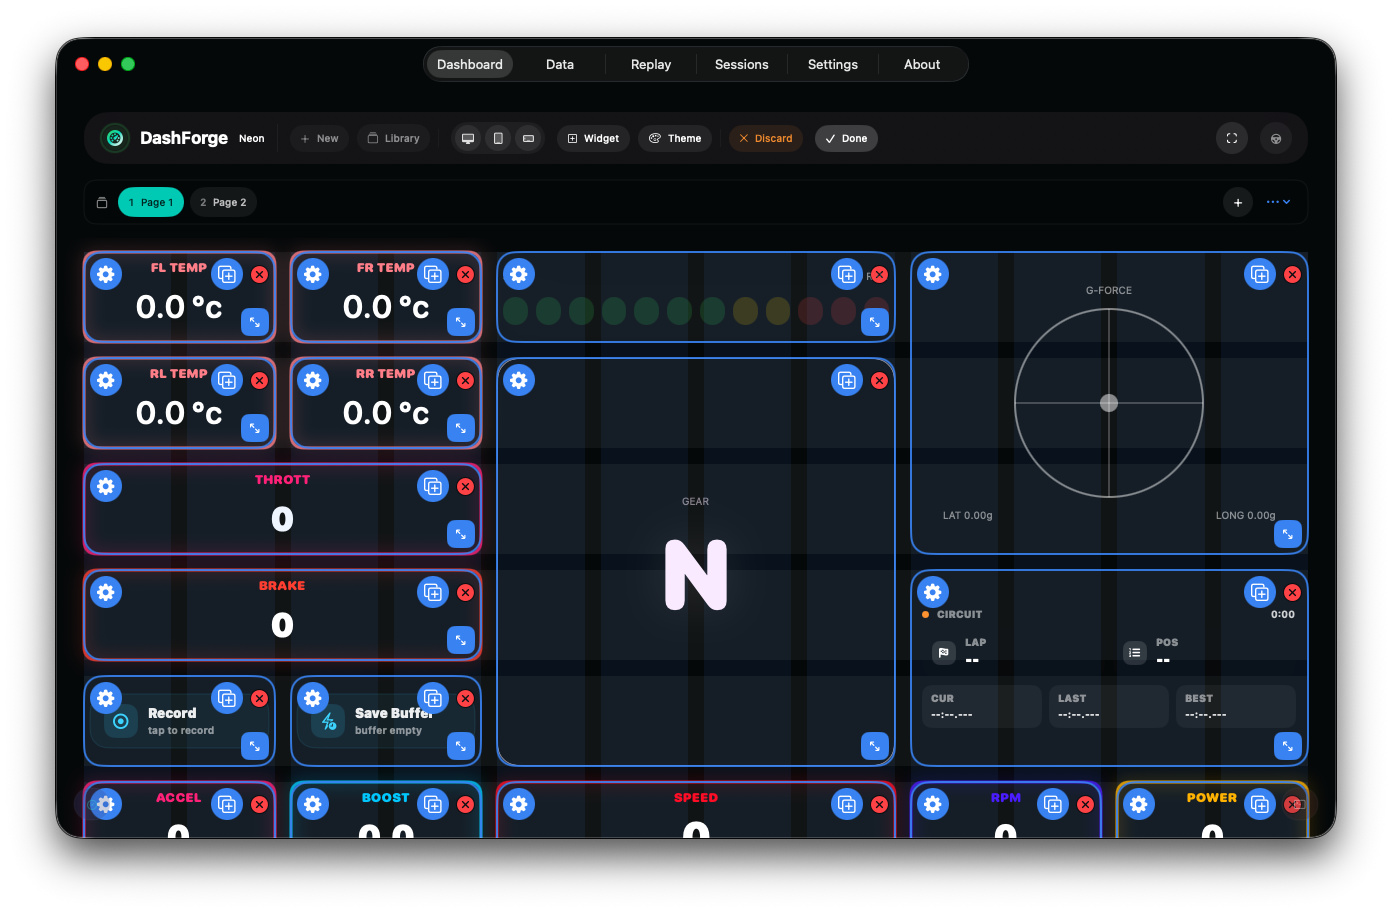
DashForge allows you to create fully customizable telemetry layouts.
You can:
- add widgets
- move widgets
- resize widgets
- duplicate widgets
- create multiple pages
- apply themes
- import templates
- edit dashboards from the local Web Builder
Recommended first dashboard:
| Widget | Why |
|---|---|
| Race Control or Analog Race Control | Main speed/RPM/gear view |
| Circuit Info | Lap and position context |
| Inputs | Throttle, brake, clutch and steering sanity check |
| Fuel Status / Battery Status | Resource awareness when supported |
Widgets and Premium
Some advanced widgets require the Premium Widgets Pack.
Premium widgets include:
- Race Control
- Analog Race Control
- Vehicle Balance
- G-Force Radar
- Drift Tyre HUD
- Multi Trace
- Live Trace
- Car Dynamics
- Braking Coach
- Corner Coach
Fuel Status, Battery Status, Telemetry Graph, Action Button, Text, Image, Sticker, and Telemetry Tile are standard widgets.
For the full catalog, see the Widget Reference.
Recording & Replay
DashForge can record telemetry sessions for later analysis.
To start recording:
- Open
Replay. - Start live telemetry.
- Press
Record. - Stop recording when you have a useful sample.
Recorded sessions can later be replayed inside the app.
DashForge stores the game profile in each recording. Replay automatically uses that parser even when another live game is currently selected.
To organize several recordings and generate a track trace with driving events, see Sessions and Analysis.
Recommended first test:
- Record 30 seconds of live telemetry.
- Stop recording.
- Replay the file.
- Create a session from it.
- Run analysis.
Multiple DashForge Devices
DashForge can discover nearby DashForge apps and securely share dashboards, recordings, and complete session packages. Incoming data is transferred only after the receiving device confirms.
See Network Discovery and Sharing.
Optional Integrations
- Use DashForge Bridge for Assetto Corsa/ACC shared memory and Windows game-control commands.
- Use Action Buttons for dashboard controls.
- Use Device Packet Output for ESP32, Arduino, serial, UDP, shift lights, and custom displays.
- Use Bass Shakers for tactile feedback.
- Use Wind Simulator for cockpit fans.
- Use
Settings > Webto edit dashboards from a browser on the local network. - Use
Settings > AIto expose DashForge commands to MCP-compatible AI tools.
Need Help?
If something looks wrong, use this order:
- Check
Datato confirm the field exists. - Check
Replayto record and reproduce the issue. - Check the performance overlay if FPS or CPU looks wrong.
- Check the relevant setup page below.