Wind Simulator
The Wind Simulator module drives fans from telemetry so the cockpit airflow rises with speed, acceleration, braking, and steering.
Use it for:
- ESP32 PWM fan controllers
- Arduino fan controllers
- left / right / center dashboard fans
- motion-rig airflow experiments
- development tests with DashForge Lab or local UDP tools
Wind Simulator is configured in:
Settings > Hardware > Wind Simulator
Basic Setup
- Open
Settings > Hardware. - Enable Wind Simulator.
- Open the Routing Panel.
- Add or keep at least one fan.
- Choose each fan placement:
Left,Center, orRight. - Add a UDP or Serial output target.
- Click Test Wind.
- Start live telemetry or replay a
.dfrecfile.
Start with two fans:
| Fan | Placement | Suggested use |
|---|---|---|
| Left Fan | Left | Driver left-side airflow |
| Right Fan | Right | Driver right-side airflow |
Add a Center fan when you want one main windshield-style airflow output.
For the Arduino Uno and ARCTIC P12 Pro build, follow Tutorial: Arduino Uno + ARCTIC P12 Pro Wind Simulator.
Fan Curve
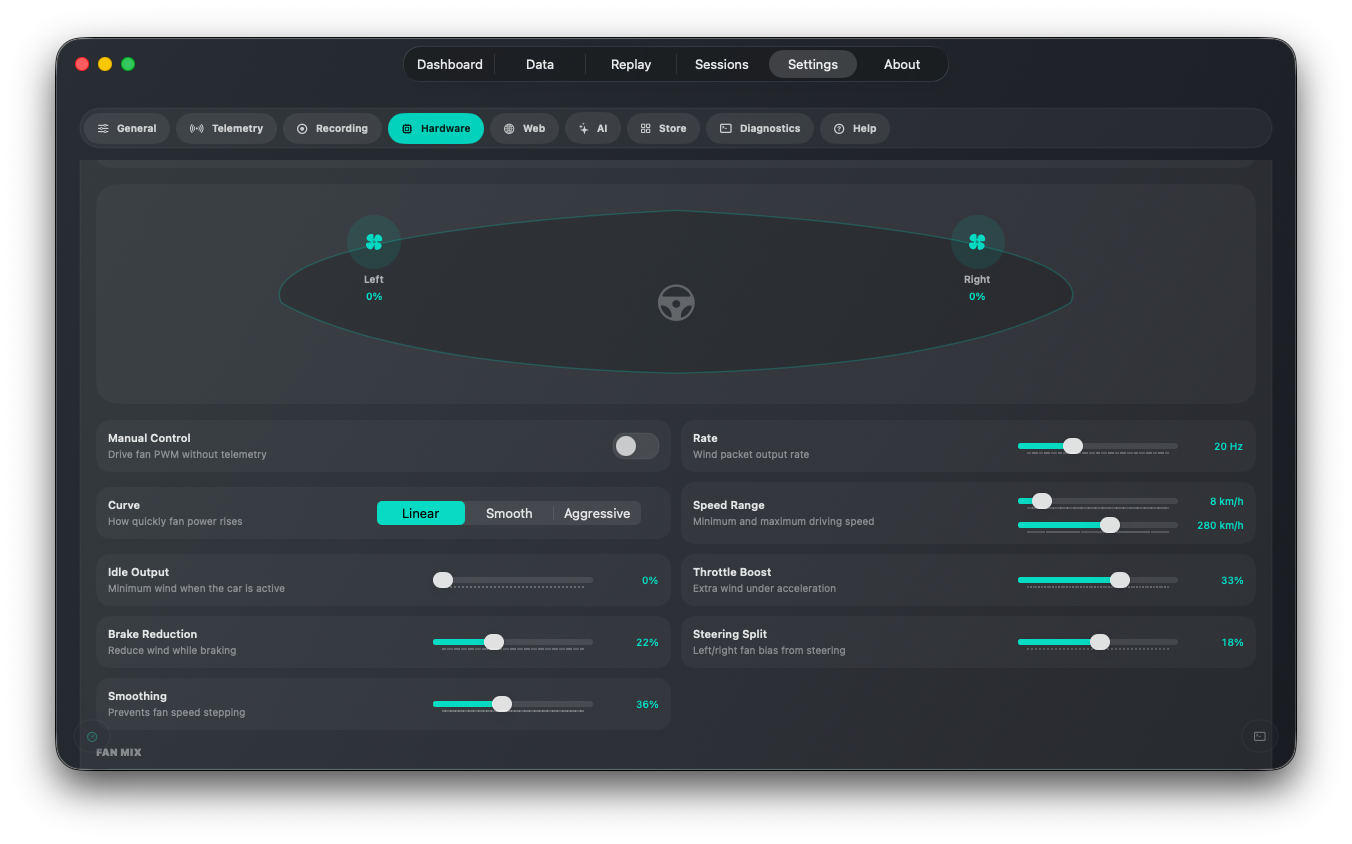
Wind output is computed from normalized vehicle speed, then adjusted by throttle, brake, and steering.
| Setting | What it does |
|---|---|
Manual Control | Lets you drive each fan from its row slider without live telemetry. |
Rate | How often DashForge sends wind packets. Start at 20 Hz. |
Curve | Shape of speed-to-fan response. |
Speed Range | Vehicle speed where fans begin and reach maximum output. |
Idle Output | Minimum airflow while the simulator is active. |
Throttle Boost | Adds airflow during acceleration. |
Brake Reduction | Reduces airflow while braking. |
Steering Split | Biases left/right fans from steering input. |
Smoothing | Prevents fan speed stepping and abrupt PWM jumps. |
Curve options:
| Curve | Feel |
|---|---|
Linear | Direct, predictable speed response. |
Smooth | Softer low speed and smoother ramp. Recommended default. |
Aggressive | Fans ramp earlier and feel stronger at medium speed. |
DashForge only sends a Wind Simulator packet when at least one routed fan PWM
value changes. Rate is therefore the maximum check/send rate, not a forced
constant stream.
Manual Control
Enable Manual Control when you want to test wiring, firmware, MOSFET boards,
or fan direction without launching a game. Each fan row gets a Manual slider.
Moving it sends the corresponding level and pwm to the configured target.
Manual control ignores telemetry and does not clear the fans just because UDP
telemetry is stopped. Disable Manual Control to return to speed-based fan
output.
Fan Rows
Each fan row has:
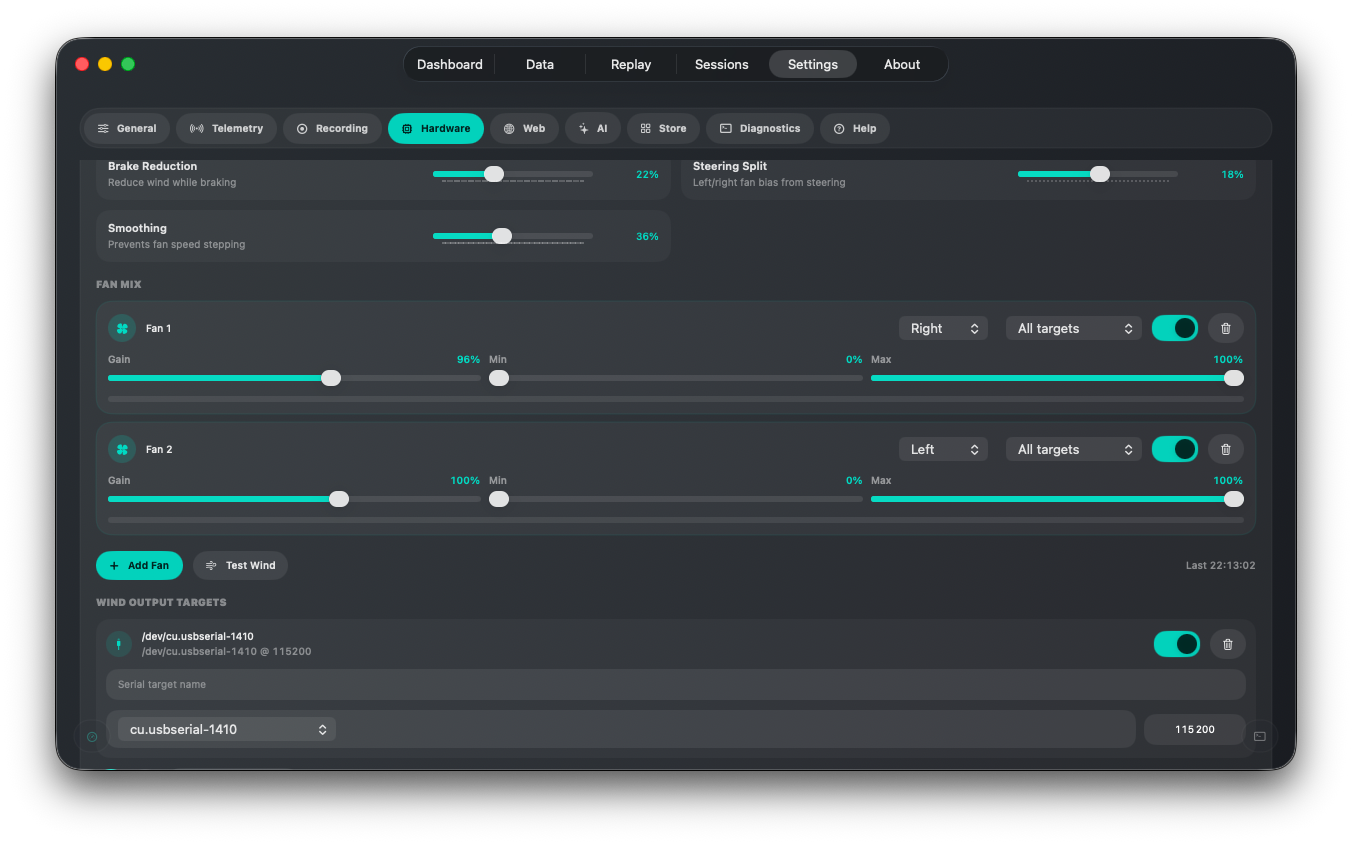
Name: friendly label shown in the cockpit preview.Placement:Left,Center, orRight.Target: where this fan is sent.Manual: direct output level whenManual Controlis enabled.Gain: per-fan output trim.Min: minimum fan output when that fan is active.Max: maximum fan output cap.- Enable toggle.
Use Min carefully. Many PC fans do not spin reliably below a certain PWM value,
but too much minimum output can make the cockpit noisy at idle.
Target routing:
| Target value | Result |
|---|---|
All targets | The fan is included in every enabled Wind Simulator output target. |
| Specific target | The fan is only included in that UDP or Serial target packet. |
Use specific targets when each fan controller has its own ESP32, Arduino, or
serial board. If a target is removed, DashForge puts fans assigned to it back on
All targets so the configuration stays usable.
UDP Output
UDP is the easiest path for ESP32 Wi-Fi fan controllers.
Recommended first test:
Host: 127.0.0.1
Port: 4211
For hardware, replace the host with the ESP32 IP address.
Existing UDP targets can be edited directly in the target row:
Target name: friendly label shown in routing menus.IP or hostname: ESP32 / controller address.Port: UDP port listened to by the controller.
Serial Output
Serial is useful for USB Arduino or ESP32 boards.
DashForge auto-detects serial outputs from /dev/cu.* and shows them as a
drop-down list for new and existing Wind Simulator Serial targets. Use the
refresh button after plugging in a board. If no serial device is detected,
DashForge keeps a manual path field for advanced setups.
On macOS, prefer real board paths:
/dev/cu.usbmodemXXXX
/dev/cu.usbserialXXXX
Pseudo-terminals such as /dev/ttys002 may be blocked by macOS sandbox rules.
For local scripts, use UDP unless you are testing a real serial board.
Existing Serial targets can be edited directly in the target row:
Serial target name: friendly label shown in routing menus.Path: serial device path.Baud: serial speed used by the firmware.
When app logging is set to Debug, DashForge also reads incoming serial lines
from the controller and writes them to the log under WindSimulator.Serial.
Use Serial.println("WIND OK") or error messages in Arduino firmware to verify
that packets are parsed correctly.
Packet Format
DashForge sends one JSON line per update.
Example:
{
  "v": 1,
  "type": "wind",
  "seq": 42,
  "sentAtMs": 1793450000000,
  "speedKmh": 165,
  "accel": 190,
  "brake": 0,
  "steer": 18,
  "fans": [
    {
      "id": "4D1D1D2D-0000-0000-0000-000000000001",
      "name": "Left Fan",
      "placement": "left",
      "targetID": "9E1F41B3-0000-0000-0000-000000000002",
      "level": 0.63,
      "pwm": 161
    }
  ]
}
Fields:
| Field | Meaning |
|---|---|
type | Always wind for Wind Simulator packets. |
level | Normalized fan command from 0.0 to 1.0. |
pwm | 8-bit value from 0 to 255. |
placement | left, center, or right. |
targetID | Optional target UUID when the fan is routed to a specific target. |
Firmware can either use pwm directly or map level to its own fan curve.
Tuning Advice
- Start at
20 Hz; fans usually do not need60 Hz. - Set
Max Speedclose to the fastest speed your car reaches often, not the theoretical top speed. - Increase
Smoothingif fans sound stepped or nervous. - Use
Throttle Boostlightly; speed should remain the main airflow driver. - Use
Brake Reductiononly if airflow feels wrong during braking zones. - Keep
Steering Splitsubtle. It is meant to add directionality, not replace the main speed airflow.
Safety
- Use a fan driver or MOSFET board appropriate for the fan current.
- Do not power fans directly from microcontroller GPIO pins.
- Add a hardware failsafe that stops fans if packets stop.
- Test with low PWM values first.
When DashForge stops receiving telemetry, the Wind Simulator clears its signal and sends zero levels to active targets.